

Table of Contents
ToggleInstalling a Ring doorbell isn’t complicated, but it does require planning and attention to a few critical details. Whether you’re upgrading an existing doorbell or installing one from scratch, the process typically takes 30 to 60 minutes for a wired model or just 15 minutes for a battery-powered unit. This guide walks you through what you need, how to prep your doorway, and how to connect everything so you’re watching your front door in real-time. We’ll also cover the gotchas that trip up most first-timers, like forgetting to turn off power at the breaker or not acclimating materials to outdoor temperature swings.
Key Takeaways
- Setup Ring doorbell installation typically takes 30–60 minutes for wired models or 15 minutes for battery-powered units, but proper preparation is essential to avoid costly mistakes.
- Turn off power at the circuit breaker and use a voltage tester to confirm zero volts before touching any wiring—this safety step is non-negotiable for wired installations.
- Inspect and prep your doorframe carefully: check for rot, ensure the surface is solid, and mount the Ring doorbell bracket at 48 inches from the ground with pilot holes for a secure, flush fit.
- Connect your Ring doorbell to WiFi using the 2.4 GHz band (not 5 GHz) and position your router within 15–20 feet to avoid connection drops and ensure stable video streaming.
- Apply weatherstripping and seal the trim ring to prevent water intrusion, the leading cause of premature doorbell failure, especially in humid or rainy climates.
- Enable two-factor authentication and motion detection zones in the Ring app to secure your account and reduce false alerts after installation is complete.
What You’ll Need Before Installation
Before you touch your doorframe, gather the right tools and materials. For a wired Ring doorbell, you’ll need a screwdriver set (Phillips and flathead), a voltage tester to confirm power is off, and possibly a drill if mounting holes don’t already exist. A miter saw or hacksaw may be necessary if you’re trimming the trim ring or doorframe to fit. For battery models, you need less, basically just screwdrivers and the included rechargeable lithium battery.
Materials vary by your setup. If you’re wiring into an existing doorbell circuit, you’ll need the Ring unit and its mounting bracket. Most come with stainless steel screws, anchors, and a trim ring to cover gaps between the doorbell and older doorframes. For wired installations, have wire strippers, electrical tape, and possibly a doorbell transformer (if you don’t have one already) on hand.
Safety first: wear safety glasses when drilling, and have a flashlight nearby if your porch is dim. If you’re uncomfortable working with low-voltage wiring or your home’s existing doorbell system, call a licensed electrician, don’t guess at live wires.
Preparing Your Doorway for Installation
The doorframe prep work is where most DIYers skip steps and regret it later. Start by inspecting your existing doorbell (if one exists). Turn off power at the circuit breaker, don’t assume it’s off just because the button doesn’t light up. Use a voltage tester to confirm zero volts across the old doorbell’s terminals. This is non-negotiable.
Remove the old unit and take note of the wiring. Wired Ring doorbells need the existing transformer circuit, so if you don’t have one, you’ll need to install one in your electrical panel (a job for a licensed pro). For battery models, you skip this step entirely.
Next, check your doorframe for rot, weathering, or misalignment. Ring doorbells are heavier than old mechanical units, so the mounting surface must be solid. If the frame is wood and feels soft, patch it with exterior wood filler and let it cure per manufacturer specs (typically 2–4 hours). Sand the patch smooth. Clean the mounting area with a damp cloth and let it dry completely, moisture and dust compromise adhesion for the included mounting bracket.
Measure twice. Mark the center point of where the unit will sit, typically 48 inches from the ground (adjustable to 54 inches for taller entryways). Use a level to ensure your marks are plumb. Drill pilot holes slightly smaller than the mounting screws if pre-drilled holes aren’t present.
Step-by-Step Ring Doorbell Installation Process
-
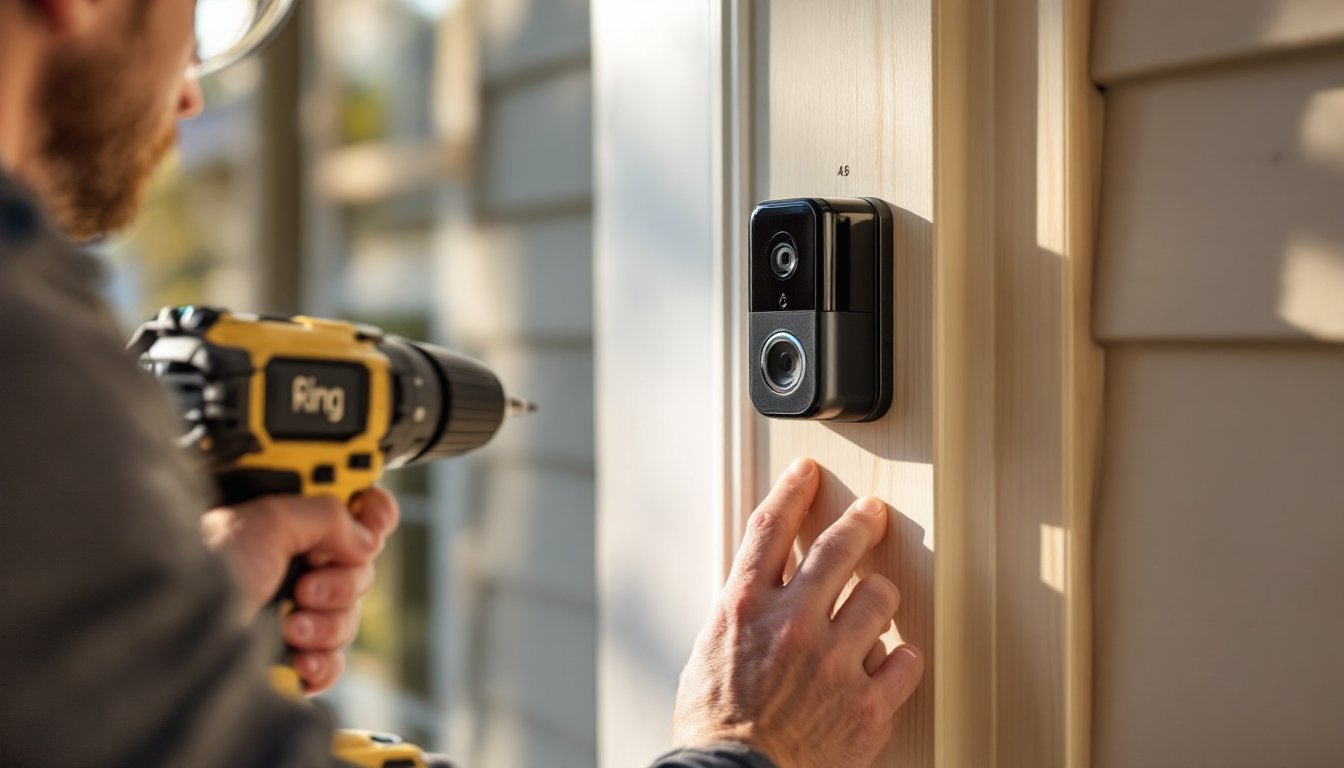
Mount the bracket. Align the included metal or plastic mounting bracket with your pilot holes. Screw it in firmly with the provided stainless steel fasteners, don’t overtighten, as you’ll strip the holes. The bracket should sit flush against the doorframe with no gaps or wobble.
-
Connect the wiring (wired models only). If you’re installing a wired Ring doorbell, strip about ½ inch of insulation from the existing doorbell wires. The Ring unit typically has two terminal screws, one for the positive line (usually labeled 16V or positive), one for return. Loosen the screws, insert the wires, and tighten firmly. Wrap the connections with electrical tape for weatherproofing. If there’s no existing doorbell circuit, you’ll need to hire an electrician to install a transformer.
-
Insert the battery (battery models). For battery-powered Ring doorbells, install the rechargeable lithium battery into the unit before mounting. The battery typically slides into a slot with a click. Don’t force it, if it doesn’t fit, you may have the wrong battery type.
-
Slide the doorbell onto the bracket. Align the Ring unit with the mounting bracket and slide it down (or sideways, depending on your model). You’ll hear a click when it’s fully seated. Don’t skip this, a loose unit won’t sit flush and water can seep behind it.
-
Attach the trim ring and weather seal. The trim ring (also called a faceplate) covers the gap between your doorbell and the doorframe. Slide it on and secure with the provided screws. Apply the included weatherstripping gasket around the back of the unit if your climate is humid or rainy. This keeps moisture out of the internals and extends the doorbell’s lifespan.
Connecting to WiFi and the Mobile App
Once the hardware is mounted, you’re halfway home. Download the Ring app (available on iOS and Android) and create or sign into your Ring account. The app walks you through adding a new device. When you’re prompted, hold your phone near the doorbell’s WiFi button (usually located on the back or underside of the unit).
Press the WiFi button for about 3 seconds until you see a white LED flash or hear a chime. The app should auto-detect the doorbell. Select your home WiFi network and enter your password. The unit will take 30–60 seconds to connect, you’ll see a confirmation in the app when it succeeds.
If your doorbell doesn’t appear in the app, confirm that your WiFi router is within 15–20 feet and that you’re using a 2.4 GHz band (not 5 GHz: older Ring models don’t support 5 GHz). If the device is on the 2.4 GHz band and still won’t connect, restart your router and try again. Once connected, the app will prompt you to enable notifications, set motion zones, and review live video feed. Do this while standing at your doorway so you can confirm the camera angle captures your porch properly.
Troubleshooting Common Setup Issues
Doorbell not receiving power (wired models). Confirm the circuit breaker is on and the transformer is supplying 16–24 volts (your electrician or voltage tester can verify). If the transformer is missing, you’ll need one installed by a licensed professional before the wired unit will function.
WiFi connection drops repeatedly. Move your router closer to the doorbell, or add a mesh WiFi node (like a TP-Link or Eero satellite) to improve range. Ring doorbells are notorious for losing connection if the signal is weak. Also check that your WiFi password is correct, typos cause authentication failures that look like the doorbell is ignoring you.
Live video is blurry or laggy. Weak WiFi is usually the culprit. You can also try adjusting the video quality in the app settings (lower bitrate = faster load, lower quality). If you’re on 5 GHz WiFi and it keeps cutting out, switch to 2.4 GHz. Older Ring models don’t support faster bands.
Trim ring won’t fit. If your doorframe is older or unusually thick, the trim ring may gap. You can file or sand the ring edges slightly, or apply foam weatherstripping to close the gap. Avoid leaving large gaps: water intrusion is the #1 cause of premature failure.
Button is unresponsive or stuck. If the button clicks but the app doesn’t register it, restart the doorbell by turning off the circuit breaker for 30 seconds, then turning it back on. For battery models, remove and reinsert the battery. If that doesn’t work, factory reset by holding the setup button (on the back) for 15 seconds and redo the WiFi pairing.
Final Checks and Security Settings
Before declaring the job done, walk through a quick checklist. Test the live video feed from your phone while standing across the porch, confirm the angle captures your visitors’ faces clearly and that night vision (infrared) activates when you test it in dim light. Ring doorbells vary in field of view (typically 160°), so if the angle feels too wide or narrow, you may be able to adjust the mount slightly.
In the Ring app, enable two-factor authentication for your account. This prevents intruders from accessing your live feed or motion history if your password is compromised. Set up motion zones to reduce false alerts from passing cars or moving trees. Most Ring units let you draw a custom motion detection area on the video feed, use this to avoid nuisance notifications.
Enable package detection if your model supports it: Ring’s AI alerts you when packages are left on your porch. Check the night vision mode in settings, IR (infrared) is good for seeing silhouettes: color night vision (newer models) is better for details but uses more battery. For wired units, neither matters much. For battery models, turning off color night vision or reducing motion detection sensitivity extends battery life between charges (typically 2–4 months of normal use).
Finally, test the actual doorbell button a few times. Have someone press it while you’re inside watching the app, confirm you get a notification, can see live video, and can talk through the speaker. If you don’t hear a chime inside the house (some homes have a chime receiver), you can enable a notification tone in the app, but it’s not a substitute for a dedicated indoor chime.
Regularly check the unit for debris, spiderwebs, or dust covering the camera lens. A quick wipe every month keeps your video crisp.
Conclusion
A Ring doorbell installation is straightforward if you follow the prep work and don’t rush the wiring (wired models). The difference between a solid install and one that fails in a year comes down to proper bracket mounting, sealed connections, and a stable WiFi signal. For battery models, it’s even simpler, mount, insert the battery, connect WiFi, and go. If you encounter wiring complications or aren’t comfortable working with your home’s electrical system, a licensed electrician can handle it in under an hour. Once installed and connected, your Ring doorbell gives you peace of mind and real-time visibility of your front door. Test it thoroughly before you consider the job complete, and don’t forget those security settings, a working doorbell is only useful if it’s protecting your account as well as your porch.