
Table of Contents
ToggleA shiplap accent wall transforms a bedroom from bland to boutique, without requiring a contractor’s price tag. Whether you’re drawn to farmhouse charm, coastal serenity, or modern minimalism, shiplap delivers character and texture that paint alone can’t match. The best part? Homeowners with basic carpentry skills and a weekend can pull this off. This guide walks you through design options, real installation steps, material costs, and finishing techniques so you can create a focal point that actually looks intentional.
Key Takeaways
- A shiplap accent wall transforms bedrooms with visual depth and texture in just one weekend using basic carpentry skills and minimal professional investment.
- Shiplap installation requires fastening to studs every 16 inches, maintaining consistent 1/16-inch gaps between boards, and careful planning around outlets and wiring for durability.
- Real wood shiplap costs $120–$280 per 10×8-foot wall including materials, while engineered options offer budget-friendly alternatives that resist moisture better than solid wood.
- Design versatility makes shiplap accent walls work across styles—from whitewashed farmhouse and rustic charcoal to contemporary white or coastal driftwood finishes.
- Paint finish matters: matte or eggshell paint reads more authentic than glossy, and testing samples on the textured surface prevents color disappointment before full installation.
- Styling your shiplap accent wall with framed art, floating shelves, and warm lighting completes the focal point while maintaining balance with the rest of your bedroom décor.
What Is Shiplap and Why It Works for Bedroom Accent Walls
Shiplap is horizontal wooden boards, usually 5 to 7 inches wide, with a distinctive rabbet joint along the edges. That overlap creates shadow lines when boards are installed, giving walls visual depth and texture. It’s different from wainscoting (which covers only the lower third of a wall) and beadboard (which has vertical grooves running lengthwise).
For bedrooms, shiplap is ideal because it softens a space without overwhelming it. One accent wall draws the eye, say, the wall behind the bed, while the other walls stay painted or wallpapered. This balance keeps the room cozy rather than cluttered. Real wood shiplap (pine, spruce, or poplar) adds warmth: engineered or synthetic options cost less and resist moisture better but feel less authentic. Shiplap also hides minor wall imperfections and wiring without requiring drywall repair.
Installation doesn’t demand perfect carpentry. Boards are forgiving: slight gaps add rustic charm, and paint covers small mistakes. The main requirement is a level wall and studs to anchor into. Most bedrooms have studs spaced 16 inches on-center, which makes fastening straightforward.
Design Inspiration: Popular Shiplap Accent Wall Styles
Modern Farmhouse and Rustic Looks
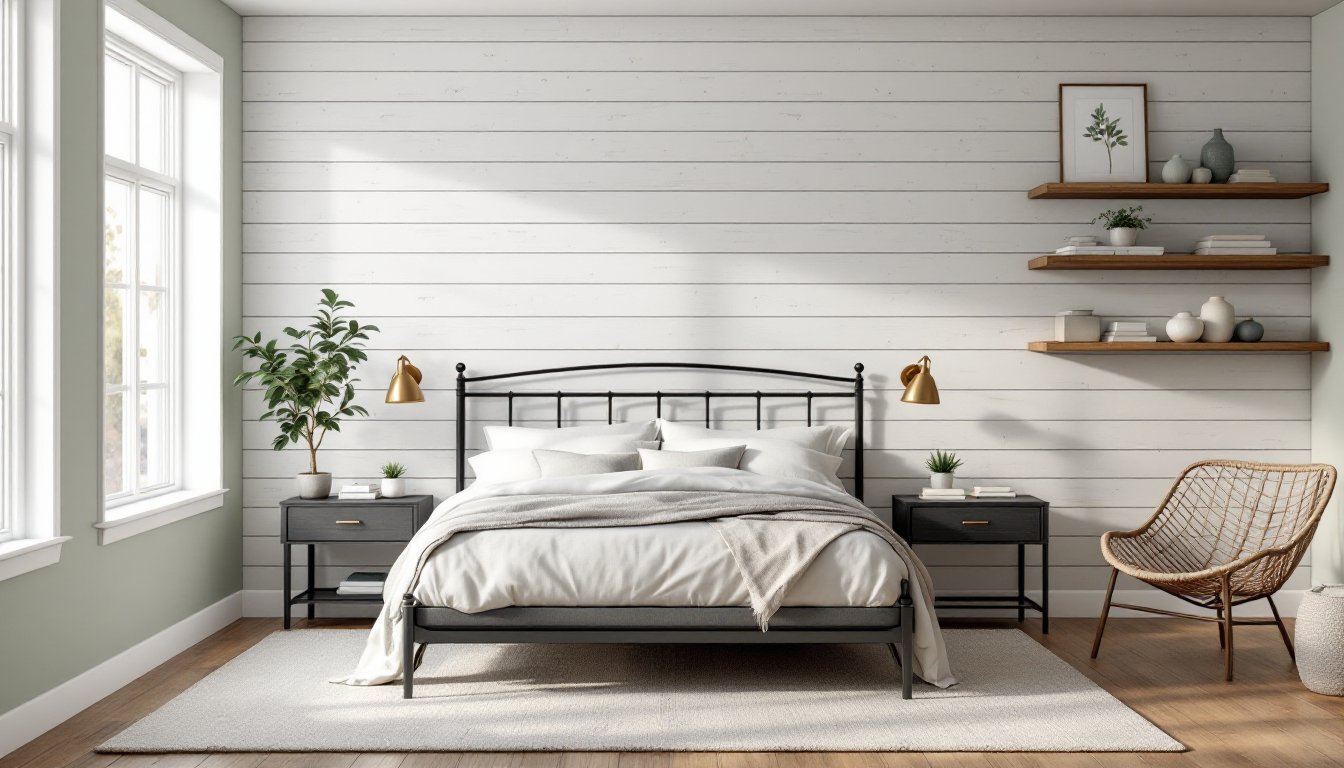
Modern farmhouse pairs shiplap with a distressed or whitewashed finish. This style works best on the wall directly behind your bed or above a bedroom dresser. Weathered gray, soft white, or pale cream paint gives that “fixer-upper” vibe without looking dated. The trick is balance: don’t go too heavy with the finish or it feels costume-y. Add black metal accents, a wrought-iron headboard or minimalist shelf brackets, to anchor the look. Real wood shiplap shows grain, which modern farmhouse embraces.
Rustic shiplap leans darker: stained wood tones or deeper paint colors like charcoal or navy. This works if your bedroom has other warm elements, exposed ceiling beams, wooden nightstands, or a stone fireplace. The risk here is heaviness, so pair dark shiplap with light bedding and reflective surfaces (mirrors, glass lamps) to keep it from feeling cave-like. Many DIYers underestimate how much a dark stain darkens a room: test a sample board first.
Coastal and Contemporary Aesthetics
Coastal shiplap is typically white, soft gray, or driftwood-colored, evoking beachy calm. This style pairs beautifully with natural linens, woven textures, and blue or green accents. Coastal works especially well in bedrooms with good natural light: it can feel cold in dark rooms. The finish should be matte or satin, glossy reads too modern and breaks the relaxed vibe.
Contemporary shiplap strips back the noise: clean white or light gray, perfectly straight installation, minimal gaps. Pair it with modern furnishings, geometric bedding, and steel or chrome fixtures. Some designers skip shiplap’s traditional overlap entirely and install boards edge-to-edge for a streamlined look. This requires more precision and less forgiveness, so it’s better for experienced DIYers or professionals.
DIY Installation: How to Install Shiplap in Your Bedroom
Before you start: Locate studs with a stud finder and mark them with pencil. Shiplap must be fastened to studs (not just drywall) for durability. Inspect your wall for outlets, light switches, and wiring: you’ll need to work around these.
Materials needed:
- Shiplap boards (pine or engineered wood: budget 10% extra for cuts and waste)
- 2.5-inch finish nails or brad nails
- Wood filler (if gaps bother you: optional)
- Sandpaper (120 and 220 grit)
- Wood primer and paint (or stain)
- Level and tape measure
- Miter saw or circular saw
Tools:
- Stud finder, nail gun (pneumatic or cordless), level, tape measure, saw, safety glasses, work gloves, dust mask
Steps:
-
Prepare the wall. Remove outlet and switch covers. If the wall is very uneven, sand high spots or add shims behind boards as you go. Uneven walls are common: shiplap forgives minor bumps better than tile or trim.
-
Start at the bottom. Snap a level line where your first board will go. Install the first board level and plumb, use your level frequently. This board sets the tone for everything above it. Nail into studs every 16 inches: use two nails per stud for stability.
-
Stack boards upward. The rabbet joint means each board overlaps the one below slightly. Boards typically overlap about ½ inch: check your product specs. Some overlap is baked into the profile: others you control. This overlap hides fasteners and creates those iconic shadow lines.
-
Maintain consistent gaps. Leave a slight gap (1/16 inch or so) between boards lengthwise to allow for wood movement. Too-tight boards will bow or buckle in humid months. Too-wide gaps look sloppy. A playing card works as a spacer.
-
Cut around obstacles. For outlets, switches, or windows, measure carefully and use a miter saw or circular saw to cut boards. Sand cut edges smooth. A jigsaw handles curved cuts if needed, though shiplap walls rarely require them.
-
Caulk seams (optional). If you prefer a seamless look, fill gaps between boards with paintable silicone caulk. Caulk looks modern and contemporary: gaps look rustic. Choose your aesthetic before installation.
-
Sand and prime. Once all boards are up, sand lightly with 120-grit to smooth mill marks, then 220-grit for a fine finish. Prime the wall with quality wood primer: cheap primer won’t hide knots and tan streaks. One coat of primer, two coats of paint (or stain).
Cost Considerations and Material Selection
Real wood shiplap (pine or spruce) runs $1.50 to $3.50 per linear foot: a 10 x 8-foot wall needs roughly 80 linear feet, so expect $120 to $280 in materials. Engineered or primed-ready shiplap costs slightly more upfront ($2 to $4 per linear foot) but saves finishing labor. Finger-jointed shiplap (shorter pieces joined end-to-end) costs less than solid boards but looks less premium.
Paint and primer add $30 to $80 depending on quality. Two coats of quality Benjamin Moore, Sherwin-Williams, or Behr paint cover that footage. Stain costs similarly but requires a clear topcoat (polyurethane or wax) for durability, adding another $20-40 and a sealing step.
Labor matters. If you install it yourself, budget for tools: a nail gun (cordless, $100-200), miter saw (if you don’t own one, $150-300), and a stud finder ($20-40). Rental is an option for one-time projects. Professional installation runs $800-1,500 per wall depending on complexity and location.
When sourcing material, engineered shiplap from brands stocked at big-box stores works fine for a bedroom accent wall, it’s forgiving and affordable. Reserve solid wood for high-moisture areas or if you want visible grain. Visit your local lumber yard for options: big-box stores stock limited profiles. Chat with staff about wood movement in your climate: dry climates need wider gaps, humid climates need smaller ones.
Finishing Touches: Paint, Stain, and Styling Your Shiplap Wall
Paint is the fastest finish. White and warm grays dominate, but don’t overlook soft blues, sage greens, or muted blacks if your décor supports them. Get a quart sample and test it on a sacrificial board or patch of wall: shiplap’s texture eats light differently than drywall, and what looks pale in the can can read murky on texture. Matte or eggshell finishes look more authentic: high-gloss screams “dated.”
Whitewashing (diluted white paint over natural wood) is trendy and forgiving. Mix paint and water 50/50, brush it on, and wipe excess with a rag. This technique emphasizes grain while lightening the wall. Dry-brushing, using less water on your brush, gives even more texture.
Stain darkens and reveals grain, ideal for rustic or lodge-style bedrooms. Water-based stains dry faster than oil-based and smell less intense. Don’t skip the topcoat (satin polyurethane or wax): shiplap in bedrooms gets dust and occasional bumps. One coat of stain plus two of topcoat is standard.
Once your shiplap is painted or stained, styling seals the look. Hang a framed print or mirror on the wall, shiplap provides excellent visual weight for art. Add a floating shelf for books or décor. Keep other elements balanced: if your shiplap wall is white and farmhouse, don’t fill the rest of the room with ultra-modern chrome. Consider how bedroom lighting interacts with your finish. Warm incandescent or dimmable LED makes shiplap feel cozy: harsh cool-white LED can make it look sterile.
For inspiration and real execution examples, designers on platforms like Young House Love share detailed before-and-afters with exact paint colors and material links. Budget-focused DIYers often share wins on sites like Making Manzanita and Addicted 2 Decorating, where you’ll see how different finishes age and photograph in actual homes.